How to Do Hip Thrusts: Correct Form, Setup, and Variations
Correct setup and form make hip thrusts activate the glutes more directly than squats or lunges — a staple of any lower-body strength programme. See the.
Key Takeaways
- Activates the gluteus maximus more directly than squats or lunges at full hip extension.
- Fills a gap squats and deadlifts leave, targeting glutes through hip extension specifically.
- The full range of motion actively trains hip mobility, which declines with prolonged sitting.
- Scales easily from bodyweight for beginners to barbell or bands for advanced trainees.
- A low couch, firm bed frame, or stacked books can substitute for a bench at home.
Knowing how to do hip thrusts correctly is the single most important factor in turning this exercise into a genuine glute-builder. When the setup and form are right, hip thrusts activate the gluteus maximus more directly than squats or lunges — making them a staple in any lower-body strength program. Whether you are training at a gym or working out at home, this guide covers everything you need to start safely and progress effectively.
8 Key Benefits of Hip Thrusts
- Builds Glute Strength and Size Hip thrusts place the glutes under maximum tension at full hip extension — the position where they produce the most force. Consistent practice may gradually improve the size, roundness, and functional power of the gluteus maximus over time.
- Improves Athletic Performance Strong glutes are the engine behind sprinting, jumping, and direction changes. Athletes who include hip thrusts in their training often notice improvements in speed and explosive output. You can explore more in the guide on Strength Training For Glutes.
- Supports Lower Back Health Weak glutes often force the lower back to compensate, leading to chronic discomfort. Strengthening the posterior chain through hip thrusts may help reduce that compensatory strain when practiced with correct form.
- Enhances Posture The hip thrust strengthens the hip extensors, which directly influences how you stand, walk, and sit. Over time, better glute activation contributes to reduced anterior pelvic tilt and improved overall posture.
- Increases Hip Mobility The full range of motion in a hip thrust — from hip flexion at the bottom to complete extension at the top — actively trains and maintains hip mobility, which tends to decline with prolonged sitting.
- Accessible for Most Fitness Levels Hip thrusts are easily scaled. Beginners can start with bodyweight, while advanced trainees can add a barbell or resistance bands. This makes them suitable whether you are just starting out or building toward heavier loads.
- Complements a Balanced Lower-Body Program Hip thrusts fill the gap that squats and deadlifts leave — they target the glutes in hip extension rather than knee flexion, making them a valuable addition in any Strength Training For Lower Body routine.
- Translates to Everyday Movement Standing up from a chair, climbing stairs, carrying groceries — all of these rely on hip extension. Strengthening this pattern through hip thrusts may gradually make daily movement feel easier and more controlled.
How to Get Started with Hip Thrusts
What You Need to Begin
For a gym setup, you need a sturdy bench or box (roughly knee height) and either a barbell or resistance band. For home training, a low couch, a firm bed frame, or a stacked set of books can work as a support surface. A yoga mat or folded towel beneath you adds comfort and grip.
- Bench or low box (at gym) or couch/step (at home)
- Barbell, dumbbell, or resistance band (optional for added load)
- Non-slip mat for the floor
- Comfortable, form-fitting shorts or tights to monitor knee alignment
Setting Realistic Goals
If you are new to hip thrusts, spend the first two weeks practicing bodyweight form before adding any load. Focus on feeling the glutes contract — not just moving the hips up and down. Progress is better measured by control and muscle engagement than by how much weight you lift. Aim for 3 sessions per week with at least one rest day in between.
Start with the Basics
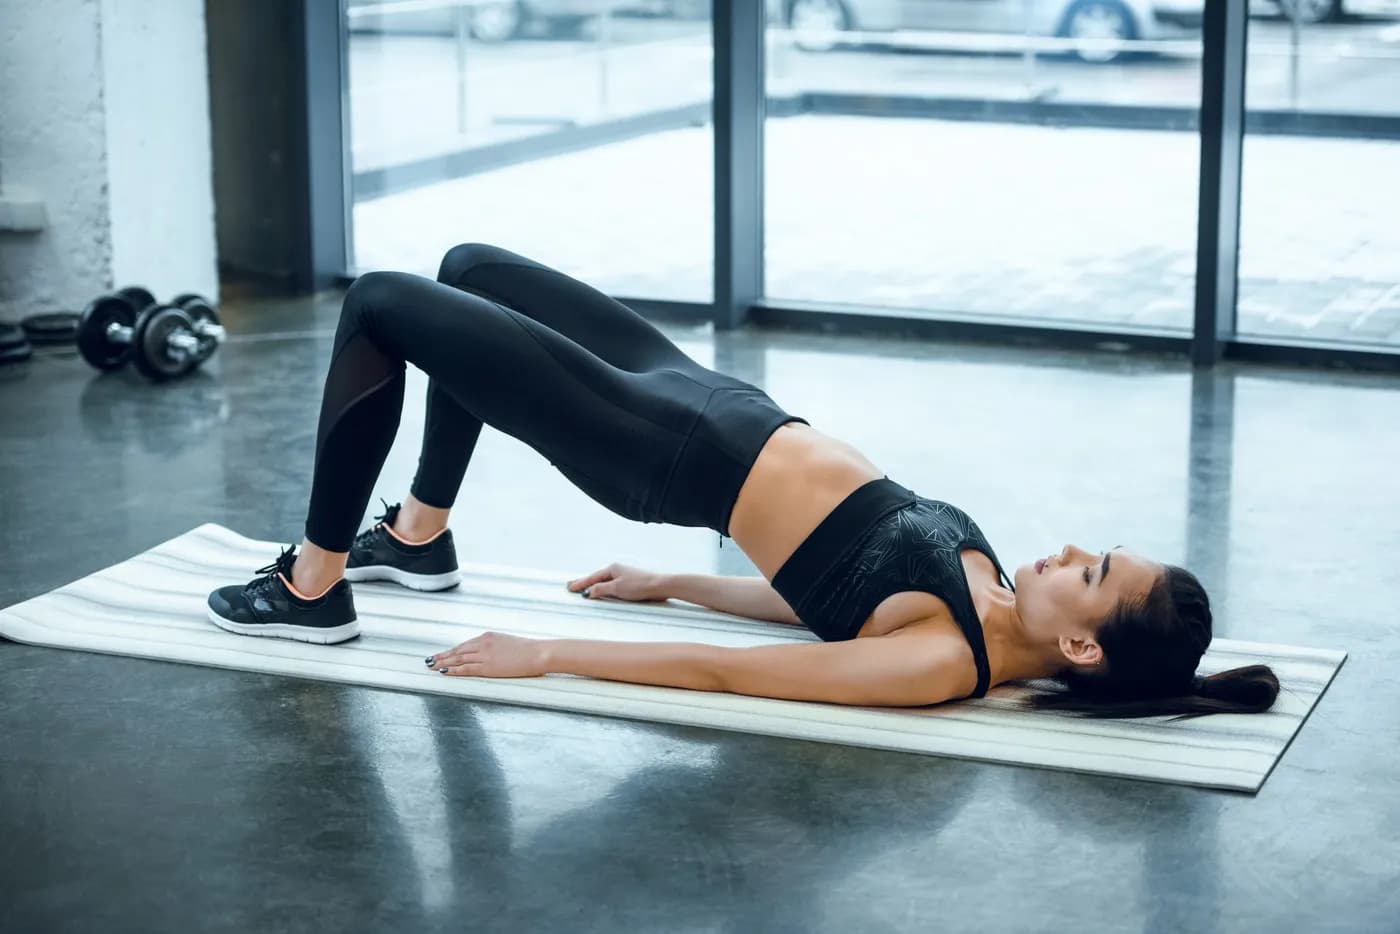
Begin with a simple bodyweight floor bridge to understand the movement pattern. Once you can hold the top position for 3 seconds with no lower back arch, move to a bench-supported hip thrust. Only add external resistance — a band, dumbbell, or plate — once bodyweight reps feel smooth and controlled for 3 sets of 15.
Best Hip Thrust Exercises and Variations
Bodyweight Floor Bridge
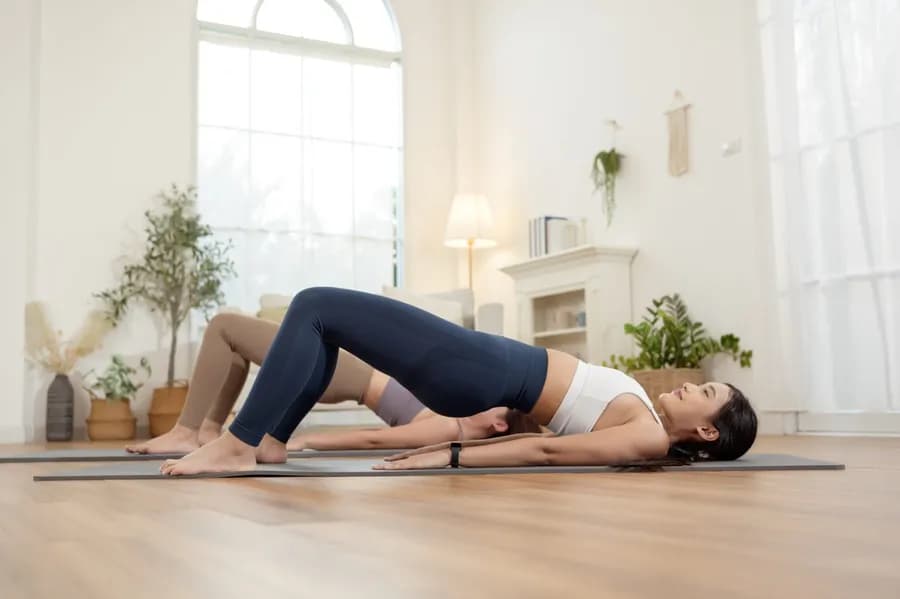
Lie on your back with knees bent and feet flat. Drive through your heels to lift your hips until your body forms a straight line from shoulders to knees. Hold 2 seconds at the top, then lower slowly. Sets/Reps: 3 × 15–20. This is the foundation — master this before progressing.
Bench-Supported Bodyweight Hip Thrust
Sit with your upper back resting against a bench, knees bent, feet flat on the floor hip-width apart. Drive hips upward until your torso is parallel to the ground. Squeeze glutes at the top for 1–2 seconds. Sets/Reps: 3 × 12–15.
Resistance Band Hip Thrust
Place a looped resistance band just above your knees or across your hips. The added tension increases glute activation at the top of the movement without requiring heavy equipment. This is the most practical home variation for progressive overload. Sets/Reps: 3 × 12.
Single-Leg Hip Thrust
Perform the bench-supported thrust with one leg extended straight in front of you. This variation corrects left-right muscle imbalances and increases core demand significantly. Sets/Reps: 3 × 8–10 per side. Keep the hips level throughout.
Dumbbell Hip Thrust
Rest a dumbbell horizontally across your hip crease and hold it in place with both hands. This is an easy way to add load at home without a barbell. Use a weight that challenges you without causing your lower back to overarch. Sets/Reps: 3 × 10–12.
Barbell Hip Thrust
The most loaded version — a padded barbell sits across the hip crease. Roll the bar into position before you set your back against the bench. Feet should be flat, toes slightly turned out. Drive through the full foot (not just the heels) and maintain a neutral spine throughout. Sets/Reps: 4 × 6–10 with progressive load.
Banded Glute Bridge Pulse
From the top of a floor bridge, pulse the hips up and down in a small range for 20–30 reps. This is excellent as a warm-up or finisher to pre-activate the glutes before heavier work. Sets/Reps: 2 × 20–25.
Common Mistakes to Avoid
- Poor Form at the Top The most common error is hyperextending the lower back at the top of the movement. Your hips should be at the same height as your shoulders, not pushed higher. Think “ribs down, glutes squeezed” rather than “arch as high as possible.” Overarching shifts work away from the glutes and onto the lumbar spine.
- Skipping the Warm-Up Cold glutes do not activate effectively. Spend 5 minutes warming up with banded clamshells, glute bridges, or hip circles before your working sets. This primes the neuromuscular connection and reduces injury risk in the hip flexors and knees.
- Feet Positioned Too Far or Too Close Foot placement changes which muscles do most of the work. Feet too far from your body loads the hamstrings; too close shifts effort to the quads. The correct position puts your shins roughly vertical at the top of the movement — test this in a mirror or with video.
- Inconsistency Results from hip thrusts build over weeks of consistent practice, not days. Many beginners do a few sessions, feel sore, and stop. The glutes respond well to frequency — 2 to 3 sessions per week is the minimum to see gradual, noticeable improvement in strength and control. Habuild’s Strength Training For Beginners guide covers how to build this consistency from day one.
Who Should Try Hip Thrusts?
- Beginners Hip thrusts are beginner-friendly precisely because you can start with zero equipment — just the floor and your bodyweight. The movement pattern is intuitive, and the risk of injury is low when form is learned progressively. Starting with floor bridges and working up to bench-supported thrusts over two to four weeks is a realistic and safe progression.
- Women Hip thrusts are one of the most effective exercises for building shape and functional strength in the lower body without adding bulk. The concern that lifting will make women appear “bulky” is a myth — hip thrusts build lean, functional muscle. Many women find this exercise particularly rewarding because results in posture and body composition become noticeable relatively quickly with consistent practice.
- Older Adults Hip extension strength is one of the key factors in fall prevention and ease of movement as we age. Bodyweight hip thrusts and floor bridges are low-impact and joint-friendly. Those with existing hip or lumbar conditions should consult their physician before beginning any new exercise program. Starting with supported, controlled variations and progressing gradually is advisable.
- Working Professionals Long hours of sitting weaken the glutes and tighten the hip flexors — a pattern sometimes called “gluteal amnesia.” Hip thrusts directly reverse this by retraining hip extension. A 10-minute session at home before or after work — no gym required — can meaningfully support posture and reduce the lower back tension that comes from desk-based work.
Build Strength with a Routine That Actually Works
Building stronger glutes and a resilient lower body is not about doing random workouts — it is about following a structured, progressive plan with the right guidance. With consistent support, you can train effectively from home and see real progress over time.
What You Get with Habuild’s Strong Everyday Program:
- Daily live guided strength and yoga sessions
- Beginner-to-advanced progression built into every week
- No-equipment and home-friendly workout options
- Expert guidance to ensure correct form on every exercise
- A community of thousands training alongside you every day
If you want to complement your strength work with flexibility and recovery, explore how yoga supports flexibility and joint mobility alongside a strength routine.
Start Your Strength Training Journey
Frequently Asked Questions
Related Articles
How to Stretch Hip Flexors: 7 Best Stretches for Tight Hips
Hours of sitting shorten the muscles connecting the spine to the legs, producing lower back pain and hip stiffness — stretching releases this within 4-6.
Hip Opening Exercises: Best Poses & Stretches Guide
Discover the best hip opening exercises to release tightness, improve mobility, and ease discomfort. Try Habuild’s guided yoga — start with a 14-day free.
How to Reduce Hip Fat: 7 Best Exercises for Slimmer, Stronger Hips
Hip and thigh fat distribution is hormonally driven, making spot reduction impossible — but strength training combined with overall fat loss reshapes the hips visibly over 8-12 weeks. See the 7 best exercises.