
Visvamitrasana (Sage Visvamitra’s Pose): Steps, Benefits & Precautions
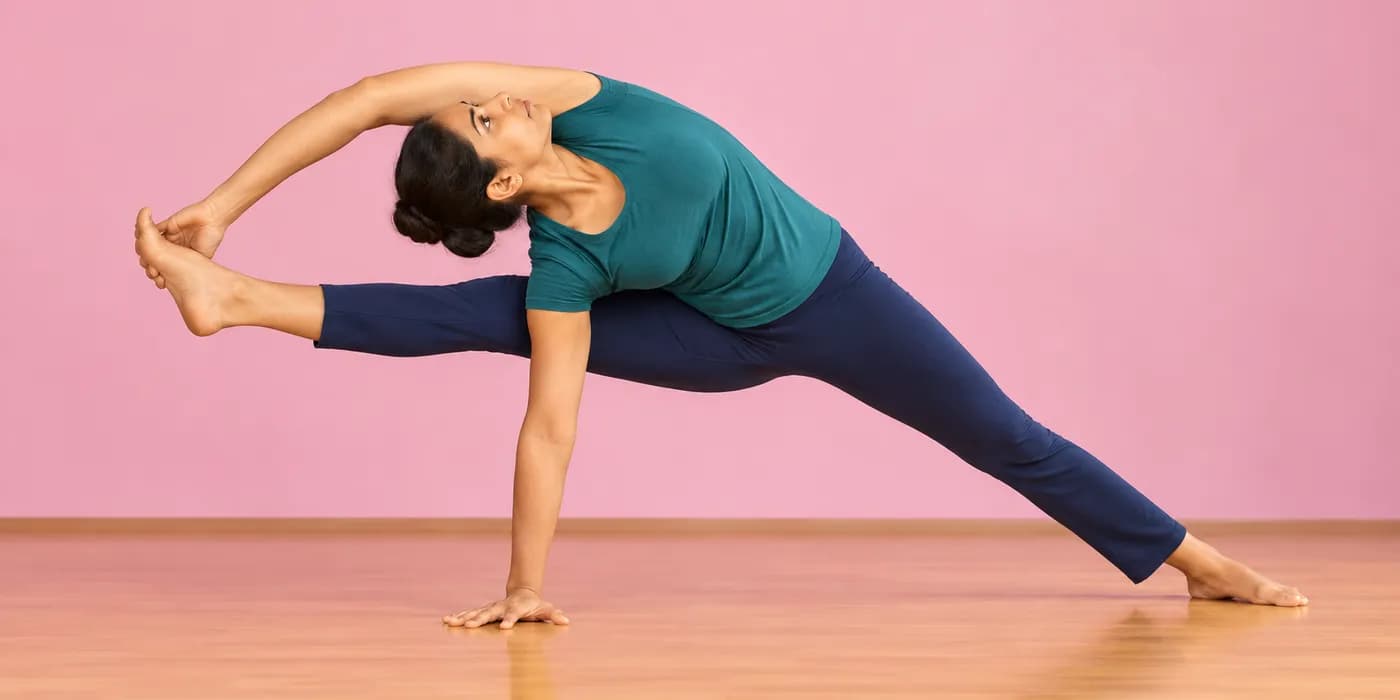
This advanced arm-balance posture, named after the Vedic sage Visvamitra, requires balancing on one hand and the outer edge of one foot.
Key Takeaways
- Named after the Vedic sage Visvamitra, whose name means friend of the universe.
- The body forms a striking diagonal line from the extended foot through the raised arm.
- Balances on one hand and the outer edge of one foot while the opposite leg extends horizontally.
- Draws on foundations from Vasisthasana, Side Plank, and deep hip-flexor work.
- Considered a pinnacle posture in advanced Hatha and Ashtanga sequences.
- Combines arm balance, deep hip opening, and lateral stretch in a single shape.
What is Visvamitrasana?
Visvamitrasana (pronounced vis-vah-mee-TRAHS-anna) is an advanced arm-balance posture named after the revered Vedic sage Visvamitra, one of the most celebrated rishis in Hindu mythology. The name derives from the Sanskrit words Visvamitra (meaning “friend of the universe”) and asana (meaning “seat” or “posture”). In English, it is most commonly referred to as Sage Visvamitra’s Pose.
In its full expression, the pose requires the practitioner to balance on one hand and the outer edge of one foot while the opposite leg is lifted and extended horizontally, often gripped by the top hand. The body forms a striking diagonal line from the extended foot through the raised arm — a shape that mirrors the legendary sage’s boundless, expansive nature.
Within the broader framework of yoga, Visvamitrasana sits at the intersection of arm balances, deep hip openers, and lateral stretches. It draws on the foundations of poses like Vasisthasana (Side Plank) and deep hip-flexor work, and is celebrated as a pinnacle posture in many advanced Hatha and Ashtanga sequences for the sheer combination of strength, flexibility, and focus it demands. If you are exploring the wider universe of postures, a good starting point is the complete guide to yoga asanas before working toward this advanced shape.
Visvamitrasana Benefits
Physical Benefits
Strengthens the Wrists, Arms, and Shoulders
Bearing the full weight of the body on one arm builds significant functional strength in the wrist, forearm, biceps, triceps, and shoulder girdle. Practised consistently, Visvamitrasana may gradually improve grip strength and upper-body endurance, making everyday pushing and lifting movements noticeably more controlled. This makes it a wonderful complement to any well-rounded yoga exercise routine focused on whole-body conditioning.
Deepens Hip-Flexor and Hamstring Flexibility
The lifted, extended leg places an intense lengthening demand on the hip flexors, hamstrings, and inner groin of both legs. Over weeks of regular practice, many practitioners find that this sustained, loaded stretch supports a gradual increase in overall hip mobility and the range of motion available in forward folds and splits. This directly addresses the tightness most desk-bound adults carry in the front of the hips.
Builds Core Stability and Lateral Body Strength
Holding the body in a lateral plane requires the obliques, transverse abdominis, and the deep stabilisers of the spine to work continuously throughout the hold. Unlike floor-based core exercises, Visvamitrasana demands anti-rotation strength — the ability to resist collapsing — which creates a uniquely functional kind of core conditioning that supports better posture in daily life.
Mental and Emotional Benefits
Calms the Mind Through Concentrated Effort
Advanced balancing poses naturally direct the practitioner's full attention to the present moment — there is simply no room for distraction when maintaining equilibrium on one arm. This quality of single-pointed focus activates the parasympathetic nervous system over time, and regular practice may gradually ease feelings of mental restlessness. In this way, Visvamitrasana supports the broader work of yoga for stress management.
Builds Confidence and Mental Resilience
Working toward and eventually achieving a challenging pose like Visvamitrasana creates a tangible sense of accomplishment that extends well beyond the mat. The incremental progress — moving from preparatory poses to partial expressions to the full shape — teaches patience and self-trust, qualities that support mental resilience in everyday challenges.
How to Do Visvamitrasana — Step-by-Step Instructions
Key Principles
Before attempting Visvamitrasana, internalise three guiding principles: ground through the supporting hand by spreading all fingers wide and pressing evenly; engage the core before lifting so the spine remains neutral rather than collapsing; and never sacrifice alignment for height — a lower leg is far safer than a hyperextended elbow or a collapsed shoulder.
Step 1: Starting Position
Begin in a low lunge with your right foot forward, right knee bent at roughly 90 degrees and left knee lowered toward the mat. Plant both hands on the floor inside your right foot, shoulder-width apart. Breathe here and feel the right hip flexor begin to open. This is the foundation for everything that follows.
Step 2: Threading the Arm Under the Leg
Shift your right hand slightly to the right and begin threading your right shoulder under your right thigh, so the back of your right upper arm contacts the outer calf or hamstring. Press the thigh actively against the upper arm — this firm connection is the key grip point that makes the entire balance possible. Keep the left hand pressing firmly into the floor.
Step 3: Planting the Supporting Hand and Rotating the Torso
Walk the left hand slightly forward and out to the left, so it sits roughly under your left shoulder. Begin rotating your torso to face the side wall, opening the chest upward. Your right palm remains firmly planted, fingers spread. You should feel the outer edge of the right foot beginning to bear weight as your hips rise.
Step 4: Extending the Right Leg and Lifting the Left Arm
Press down through your left hand and the outer edge of your right foot as you begin to straighten the right leg, lifting the hips until the body forms a lateral line. Reach your left arm upward toward the ceiling, stacking the left shoulder over the right. If the leg cannot fully straighten yet, a soft bend at the knee is completely fine — keep the chest open and the core firm.
Step 5: Final Position and Hold
In the full expression, reach the left hand up and over to grasp the right foot or big toe, drawing the foot slightly higher without forcing the hip open. The gaze (drishti) travels upward toward the top hand or the ceiling. Hold for three to five steady breaths, lengthening the body on each inhale and firming the core on each exhale. You should feel a long, powerful diagonal line from heel to fingertips.
Step 6: How to Come Out of Visvamitrasana
Release the grip on the foot first, then lower the left hand back to the floor. Bend the right knee and lower the right foot beside the left hand, returning to a low lunge. Take a breath here before transitioning to the other side. Never push out of the pose abruptly — a slow, controlled exit protects the wrist and shoulder joint.
Breathing in Visvamitrasana
Use the breath as an architectural tool in this posture. Inhale to lengthen through the spine and create space between the ribcage and the hip. Exhale to deepen the core engagement and stabilise the shoulder. Avoid holding the breath — in an arm balance, restricted breathing causes premature muscular fatigue and increases the risk of a sudden collapse. Aim for slow, rhythmic ujjayi-style breaths throughout the hold.
Preparatory Poses Before Visvamitrasana
Building these four shapes into your regular practice will warm up the exact muscle groups Visvamitrasana demands and meaningfully reduce the risk of strain.
- Vasisthasana (Side Plank Pose): Develops one-arm balance and trains the obliques and shoulder stabilisers that the full pose relies upon.
- Utthita Parsvakonasana (Extended Side Angle Pose): Opens the hip and inner groin while building the lateral body awareness needed to hold the diagonal line cleanly.
- Anjaneyasana (Low Lunge): Loosens the hip flexors and front of the thigh, which must be sufficiently open before the arm can thread under the leg comfortably.
- Supta Padangusthasana (Reclining Hand-to-Big-Toe Pose): Passively stretches the hamstrings of the leg that will be extended, making full straightening of the leg far more accessible during the pose.
Variations of Visvamitrasana
Variation 1: Supported Visvamitrasana with Bent Knee
Difficulty: Beginner–Intermediate. Instead of straightening the top leg fully, keep a generous bend in the knee while still threading the arm under the thigh and rotating the torso open. The bent knee reduces the hamstring demand significantly and allows the practitioner to focus entirely on shoulder stability and core control. This is the most recommended entry point for anyone new to the pose or with tight hamstrings.
Variation 2: Visvamitrasana with a Strap
Difficulty: Intermediate. If you cannot grip the foot with the top hand without collapsing the shoulder, loop a yoga strap around the extended foot and hold the strap with the top hand. This keeps the chest open and the spine long while still allowing you to experience the full lateral rotation of the posture. Over time, as flexibility increases, the strap length can gradually shorten until it is no longer needed — making this a particularly useful visvamitrasana variation for building toward the classical shape.
Variation 3: Full Visvamitrasana with Foot Grip
Difficulty: Advanced. The complete classical expression of the pose — extended leg, top hand gripping the big toe or foot, gaze directed upward. The challenge here is maintaining equal weight distribution between the supporting hand and foot while keeping the hips lifted and the core active throughout each breath. This visvamitrasana variation demands accumulated strength and flexibility built across months of consistent preparation.
Common Mistakes to Avoid in Visvamitrasana
Collapsing the Supporting Shoulder
Allowing the shoulder of the supporting arm to sink toward the ear is the most common error and the one most likely to cause injury. Keep the shoulder blades actively drawn toward the spine and press the floor away with the supporting hand to maintain a strong, elevated shoulder position throughout the hold.
Holding the Breath
Gripping and straining through the pose with a held breath destabilises the core and rapidly depletes muscular endurance. Commit to continuous, rhythmic breathing from the moment you enter the pose — if you cannot breathe freely, come down, rest, and re-enter.
Forcing the Leg Straight Before the Hamstrings Are Ready
Locking the knee when the hamstrings are still too tight strains the back of the knee and throws the hip out of alignment. Accept a generous bend in the extended leg and allow the straightening to develop organically over weeks of practice.
Placing the Supporting Hand Too Far Inward
When the hand sits directly below or inside the shoulder rather than slightly in front and to the outside, the mechanical advantage is lost and the wrist bears disproportionate load. Before lifting, check that the supporting hand is slightly in front of the shoulder joint and the fingers point away from the body.
Neglecting the Foot–Arm Connection
The contact between the back of the upper arm and the outer thigh is the structural hinge of the whole pose. If this contact is weak or passive, the leg slips and the balance collapses. Actively press the thigh into the upper arm and resist that pressure with the arm — this co-contraction is what locks the pose into place.
Rushing Through the Entry
Jumping or jerking into the arm balance rather than threading in slowly and deliberately increases the risk of wrist and shoulder strain. Treat every transition into the pose as a practice in itself — slow, deliberate entry teaches the body the correct motor pattern and builds the trust required to hold the final shape.
Who Should Practise Visvamitrasana?
Those with Tight Hips and Hamstrings
While it may seem counterintuitive to recommend an advanced pose to those with tightness, the preparatory journey toward Visvamitrasana — with its emphasis on hip openers, hamstring stretches, and lateral body work — systematically addresses exactly those restrictions. Practitioners working on the modified version with a bent knee and a strap will find that their hip mobility gradually improves with consistent practice. Always begin with the supported variation and progress only as the body opens.
Is Visvamitrasana Good for Beginners?
In its full expression, Visvamitrasana is not a pose for complete beginners. However, the preparatory steps and the bent-knee variation can absolutely be explored by motivated practitioners who have a solid grounding in side plank and basic hip openers. If you have been practising for six to twelve months and are comfortable with foundational yoga poses for beginners, you can safely start working toward this posture with the modifications described above. Live guidance makes the journey significantly safer and more efficient.
Working Professionals Seeking Full-Body Conditioning
For someone who spends long hours at a desk, Visvamitrasana counteracts the forward-rounded posture, closed hips, and weakened lateral stabilisers that desk work creates. The lateral rotation of the torso restores thoracic mobility, the hip-opening aspect addresses anterior hip tightness, and the arm balance wakes up muscles that sitting leaves dormant. It is a single pose that touches nearly every postural pattern a sedentary lifestyle compresses.
Intermediate and Advanced Practitioners
For those who have mastered arm balances like Bakasana and lateral poses like Vasisthasana, Visvamitrasana offers the next logical challenge in the progression. It integrates flexibility, strength, and balance in a way that few other postures do, making it a deeply satisfying milestone and an ongoing refinement practice even for experienced yogis. Joining structured online yoga classes is one of the most effective ways to track and accelerate that progress consistently.
Make Visvamitrasana a Part of Your Life
Visvamitrasana is one of yoga’s most complete postures — combining arm balance, deep hip opening, hamstring flexibility, core strength, and lateral body awareness into a single shape. Its benefits extend well beyond the mat, addressing the postural patterns and muscular imbalances that modern lifestyles create, and the psychological reward of working steadily toward something genuinely difficult is equally real.
Whether you are a complete newcomer or a seasoned practitioner, the pose is accessible at some level. The bent-knee variation, the strap modification, and the step-by-step preparatory sequence described here mean you can start building toward this pose safely today — regardless of your current flexibility or strength. With real-time alignment feedback, the risk of frustrating detours is much lower than it would be practising independently.
Frequently Asked Questions
Related Articles
20 Benefits of Yoga
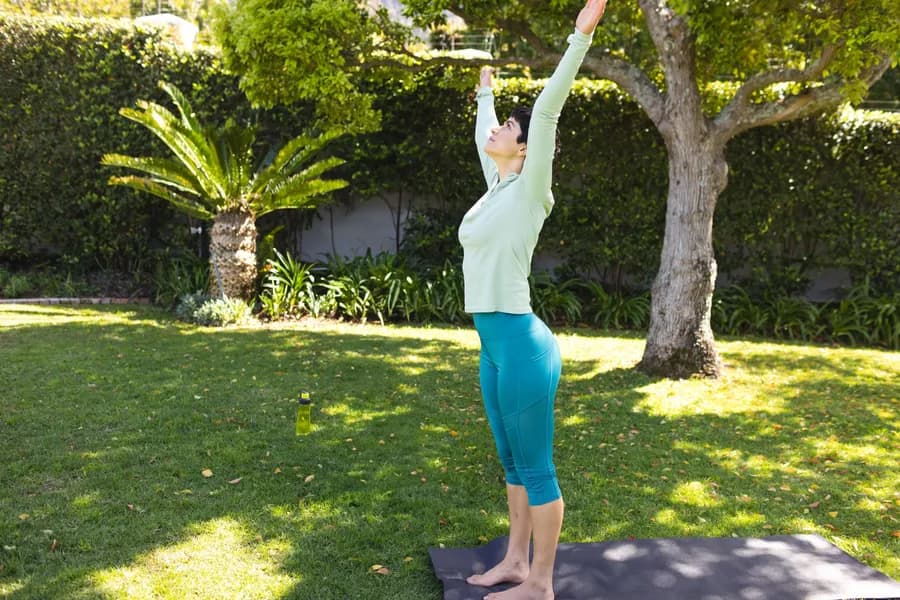
Yoga acts simultaneously on the musculoskeletal system through asana, the autonomic nervous system through pranayama and meditation, and the endocrine system through parasympathetic activation. See all 20 benefits.
How to Do Side Plank Exercise — the Complete Form Guide and Daily Routine for Stronger Obliques
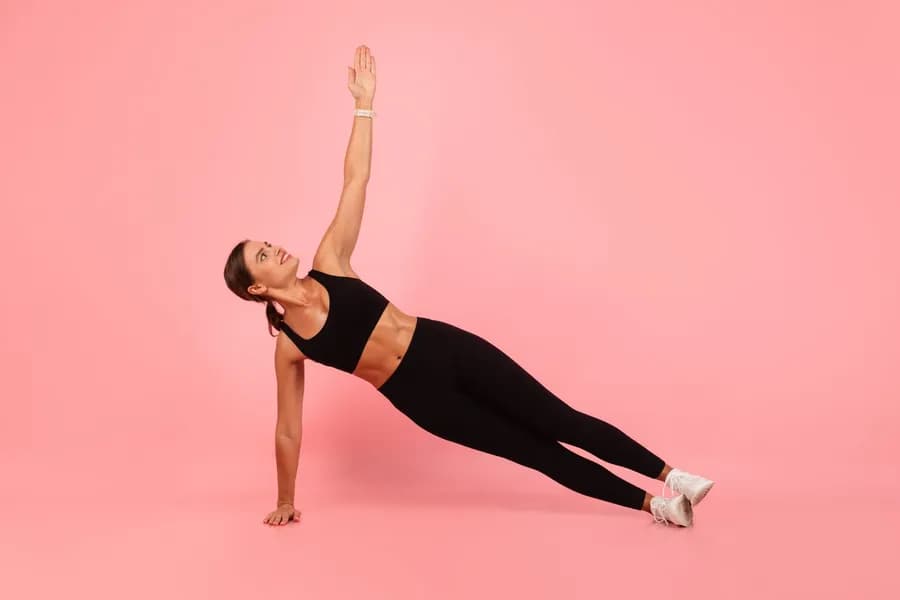
Stacking the body in a single plane and lifting the hips into a straight line from heels to head engages the entire lateral chain isometrically. See the complete form guide.
Arm Balance Yoga Poses: Steps, Benefits and Progressive Guide
The body balances entirely on the arms, typically with the legs lifted and the torso horizontal — a more horizontal orientation than the vertical