
Yoga Poses for Legs: Steps, Benefits & Precautions
These asanas strengthen, stretch, and stabilise the entire lower body, from the hips and thighs down to the calves and ankles. See the poses, benefits,.
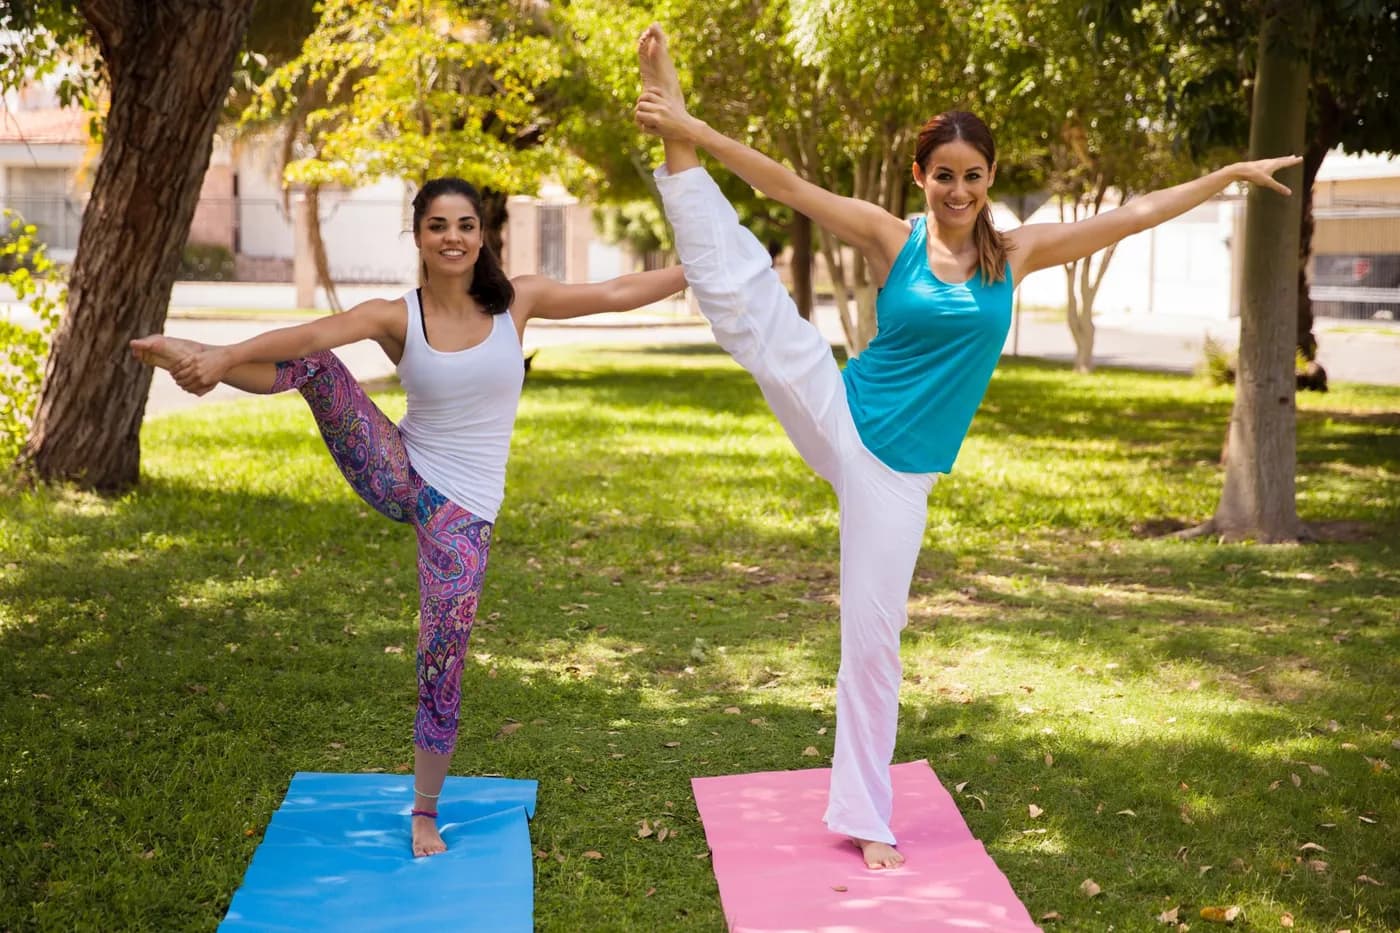
Key Takeaways
- Strengthens and stabilizes the entire lower body from hips and thighs to calves and ankles.
- The Sanskrit word pada, meaning foot or leg, appears throughout many classic asana names.
- Warrior I and II build muscular endurance and heat in the thighs and glutes.
- Pigeon Pose and Supta Padangusthasana release tension in the hamstrings and IT band.
- Strong thigh muscles directly protect the knee joint by absorbing load before it arrives.
- Relevant to runners, desk workers, seniors, and advanced practitioners alike.
Yoga poses for legs are asanas that strengthen, stretch, and stabilise the entire lower body — from the hips and thighs down to the calves and ankles. Practised consistently, they improve posture, joint health, and circulation, making them relevant to beginners, desk workers, runners, and advanced practitioners alike.
What are Yoga Poses for Legs?
Yoga poses for legs are a group of asanas specifically designed to strengthen, stretch, and stabilise the entire lower body — from the hips and thighs down to the calves and ankles. In the traditional yoga system, these poses form the foundation of most standing sequences and are considered essential before attempting more advanced postures. The word “pada” (पाद) in Sanskrit means foot or leg, and it appears in the names of many classic asanas precisely because the legs are viewed as the structural root of the body.
These poses vary widely in character. Some — like Warrior I and II — build muscular endurance and heat. Others — like Pigeon Pose and Supta Padangusthasana — release deeply held tension in the hamstrings, hip flexors, and IT band. Together they represent a complete lower-body practice within the broader yoga system, not just an isolated set of exercises.
Practised consistently, yoga poses for legs improve posture, joint health, and circulation. They are relevant to everyone: runners, desk workers, seniors, and advanced practitioners alike. Whether you are exploring yoga for overall flexibility or addressing a specific concern like tight hamstrings or knee discomfort, leg-focused asanas are a reliable starting point.
Yoga Poses for Legs — Benefits
Physical Benefits
Benefit 1: Strengthens the Quadriceps, Hamstrings, and Glutes
Standing poses such as Warrior I, Warrior II, and Chair Pose place sustained load on the major muscle groups of the thigh and gluteal region. Holding these poses for several breaths builds functional strength that carries over into everyday movement — climbing stairs, walking long distances, and maintaining stable posture while seated. Regular practice gradually conditions these muscles without the impact stress of gym-based training.
Benefit 2: Improves Flexibility in Hamstrings and Hips
Tight hamstrings are one of the most common complaints among adults who sit for long hours. Yoga leg stretches — including Standing Forward Fold, Reclined Hand-to-Toe Pose, and Half Splits — systematically lengthen the posterior chain. As these muscles release, hip mobility improves alongside them, making everyday movements feel noticeably freer over time.
Benefit 3: Supports Knee Joint Health and Stability
Strong thigh muscles directly protect the knee joint by absorbing load before it reaches the joint surface. Poses like Tree Pose and Low Lunge, when performed with correct alignment, reinforce the muscles around the knee and train the body to track the knee properly over the foot. This is especially valuable for anyone recovering from mild knee discomfort or looking to prevent future problems. Those dealing with more acute issues will also find support through yoga practices designed specifically for knee pain.
Benefit 4: Stimulates Blood Circulation in the Lower Body
Many people experience poor circulation in the legs — manifesting as cold feet, swelling, or heaviness after sitting. Inversions and semi-inversions like Legs-Up-the-Wall (Viparita Karani) and forward folds encourage blood to flow back toward the heart, reducing fluid pooling. Even dynamic standing sequences generate the muscular pump action that supports healthy venous return.
Mental and Emotional Benefits
Benefit 5: Calms the Nervous System and Reduces Stress
Hip-opening yoga poses for legs — particularly Pigeon Pose and Bound Angle Pose — are widely recognised for their ability to release tension stored in the hip region. The sustained, slow holds required in these poses activate the parasympathetic nervous system, signalling the body to shift out of a fight-or-flight state. Many practitioners report a noticeable reduction in anxiety and mental restlessness after a dedicated leg and hip sequence.
Benefit 6: Improves Focus, Grounding, and Mental Stability
Balancing poses like Tree Pose (Vrksasana) and Warrior III demand full mental attention. A wandering mind immediately shows up as physical wobble — which means these poses are a practical tool for training present-moment focus. Over weeks of consistent practice, this quality of grounded attention tends to extend beyond the mat into daily life.
How to Do Yoga Poses for Legs — Step-by-Step Instructions
The sequence below focuses on Eka Pada Rajakapotasana (Pigeon Pose) — one of the most effective and complete yoga poses for legs, hips, and the entire lower body. It addresses the hip flexors, external rotators, glutes, and thighs in a single hold, making it the centrepiece of any leg-focused practice.
Key Principles
Alignment over depth: it is far more productive to hold a shallower version with a long spine than to collapse into a deep fold. Keep your hips square to the front of the mat. Use a folded blanket or block under the sitting bone of the bent leg if the hip does not reach the floor — this is not optional if you feel uneven.
Step 1: Starting Position
Begin in a tabletop position — hands directly under shoulders, knees under hips. Spread your fingers wide and press firmly through your palms. Take two slow breaths here, feeling the stability of the base you are creating before moving into the pose.
Step 2: Slide the Knee Forward
From tabletop, slide your right knee forward toward your right wrist. The right ankle moves toward your left wrist, creating an angle with the shin. The degree of the angle depends on your hip mobility — a 45-degree shin is perfectly valid. Avoid torquing the knee: the movement comes from the hip rotating outward, not from forcing the shin into position.
Step 3: Extend the Back Leg
Slowly slide your left leg back until it is straight, with the top of the left foot resting on the mat. Check that your left hip is moving toward the floor — not twisting up to the ceiling. If the right hip lifts, place a folded blanket beneath it. Feel an active lengthening through the left quadriceps as the hip flexor begins to open.
Step 4: Square the Hips
This is the most important alignment step. Draw your right hip back and nudge your left hip slightly forward so both hip points face the front of the mat evenly. Place your hands on the mat beside your hips for now. If you feel a sharp pinch in the right knee, back off immediately and reduce the angle of the shin. A dull stretch in the outer right glute and hip is normal and productive.
Step 5: Final Position and Hold
On an exhale, walk your hands forward and lower your torso toward the mat. You may rest on your forearms or place your forehead on stacked hands — this is the advanced pigeon pose fold. Hold for 5–10 slow breaths, allowing gravity to do the work. Resist the urge to fidget; the release happens in stillness. Feel the gradual softening of the outer right hip with each exhale.
Step 6: How to Come Out of Pigeon Pose
Press your palms firmly into the mat and slowly walk your hands back toward your hips, rising to an upright seated position. Tuck the right foot and gently swing the right knee back to tabletop. Pause in a neutral Child’s Pose for 2–3 breaths to neutralise the hip before repeating on the left side. Never rush this transition — the hip needs a moment to reset.
Breathing in Pigeon Pose
Inhale to lengthen the spine before folding. Exhale to release deeper into the hold. Once in the final position, breathe slowly and evenly — a 4-count inhale, a 6-count exhale works well. Any sensation of holding the breath or bracing suggests you have gone too deep; back off slightly until the breath flows freely.
Preparatory Poses Before Pigeon Pose
Jumping into Pigeon Pose without warming up the relevant muscle groups can cause unnecessary strain, particularly around the knee and hip. Spend 5–8 minutes on these preparatory poses first:
- Supta Baddha Konasana (Reclined Bound Angle Pose) — gently opens the inner groin and hip rotators before external rotation is required.
- Low Lunge (Anjaneyasana) — stretches the hip flexor of the back leg, which will be held in extension during Pigeon Pose.
- Thread the Needle / Figure-Four Stretch — directly mimics the hip position of Pigeon Pose while lying on your back, making it ideal for beginners who find the full pose inaccessible.
- Standing Forward Fold (Uttanasana) — warms up the hamstrings along the back of both legs and prepares the posterior chain for the deep hold ahead.
Variations of Pigeon Pose
Variation 1: Reclined Pigeon Pose (Supine Version) — Beginner
Lie on your back with both knees bent and feet flat on the floor. Cross the right ankle over the left thigh, flex the right foot, and either keep the left foot on the floor or draw the left knee toward your chest. This variation is ideal for beginners, anyone with a sensitive knee, or those who find the floor version inaccessible. It delivers nearly the same hip-opening benefit with far less demand on knee and ankle.
Variation 2: Half Pigeon with Upright Torso — Intermediate
Set up the standard Pigeon Pose but keep the torso upright rather than folding forward. Place your hands beside your hips or on blocks for support. Sitting tall changes the stretch emphasis slightly — you feel it more in the outer hip and less in the lower back. This is the version most commonly taught in intermediate classes as a bridge between the reclined and full expressions.
Variation 3: King Pigeon Pose (Eka Pada Rajakapotasana) — Advanced
From the full Pigeon Pose with torso upright, bend the back knee and reach back with one or both hands to catch the foot or ankle. This advanced pigeon pose variation adds a deep quadriceps and hip flexor stretch on the back leg simultaneously, while also opening the chest and shoulders. Only attempt this when the standard version feels comfortable and the hips sit evenly on the mat without support.
Common Mistakes to Avoid in Yoga Poses for Legs
Collapsing the Arch of the Front Foot
In Pigeon Pose, the front foot should be actively flexed — not sickling or collapsing at the ankle. A flexed foot engages the lower leg muscles and, critically, protects the medial ligaments of the knee from unwanted torque. Every time you feel the foot go slack, re-engage it.
Hiking One Hip Higher Than the Other
Uneven hips are the most common error in this pose. If the front hip lifts off the mat, the pelvis twists and the stretch moves into the lower back rather than the intended hip. Always use a prop under the raised hip — there is no merit badge for going prop-free at the cost of alignment.
Forcing the Shin into a Parallel Position
Social media often depicts the front shin perfectly parallel to the top of the mat. For most people, especially beginners, this is not immediately accessible and trying to force it strains the knee. Keep the angle of the shin at whatever degree allows the hips to stay square and the breath to remain easy.
Holding the Breath During the Hold
Many practitioners unconsciously hold the breath when they meet intense sensation. This activates the stress response and prevents the muscles from releasing. If you notice breath-holding, back out of the pose by 10% and re-establish smooth breathing before settling in again.
Skipping the Counter Pose
Coming directly out of Pigeon Pose and moving to the next posture without a brief neutral reset — such as Child’s Pose or Downward Dog — leaves the hip in an asymmetric state. Always take 2–3 breaths in a symmetrical position between sides.
Rushing Through the Hold
Pigeon Pose requires time. Holding for fewer than 5 breaths barely scratches the surface of the fascial and muscular release the pose offers. Aim for a minimum of 8–10 slow breaths per side, especially if you are using this pose to address tightness accumulated from sitting or running.
Who Should Practise Yoga Poses for Legs?
Those with Back Pain, Hip Tightness, or Poor Posture
Tight hip flexors and weak glutes are two of the most common underlying contributors to chronic lower back discomfort. Yoga poses for legs — particularly hip-openers and hamstring stretches — address both simultaneously. When the posterior chain lengthens and the hips move more freely, the lumbar spine is relieved of compensatory load. Those interested in a targeted approach can also explore yoga practices specifically for back pain alongside their leg work.
Is Pigeon Pose Good for Beginners?
Yes — with the right modification. Beginners should start with the Reclined Pigeon Pose (described in the variations section) and graduate to the floor version once the hip flexibility to maintain even hips is established. Attempting the full pose too early without proper warm-up or props is the main reason beginners find it uncomfortable. Under live guidance, the transition from modified to full expression is typically smooth and happens naturally within a few weeks of consistent practice. If you are just starting out, reviewing a broader set of fundamental poses for beginners will give you a solid foundation before deepening into leg-specific work.
Working Professionals and Desk Workers
Hours of sitting compress the hip flexors and switch off the glutes — a combination that leads to stiffness, lower back fatigue, and reduced leg circulation. A short daily sequence of yoga leg stretches — even 15–20 minutes — can meaningfully counter these effects. Desk workers in particular benefit from the hip-opening and hamstring-lengthening combination that standing and floor-based leg poses deliver.
Runners, Cyclists, and Active Individuals
Athletes who use their legs repetitively in one plane of motion — running, cycling, or climbing — often develop significant tightness in the IT band, hip flexors, and hamstrings. Yoga poses for legs introduce the lateral and rotational movements that sport rarely provides, creating more balanced and resilient lower-body tissue. Many runners report that consistent Pigeon Pose practice supports recovery and helps manage the hip and knee tightness that tends to accumulate during training blocks.
Make Yoga Poses for Legs a Part of Your Life
Yoga poses for legs — from foundational stretches to the full expression of Pigeon Pose — offer a structured, joint-friendly way to build strength, release tension, and improve mobility across the entire lower body. Whether you are addressing tightness, building balance, or simply moving better in daily life, these asanas have something meaningful to offer at every level of practice.
If you are a complete beginner, the modified versions and preparatory poses outlined above make the full sequence genuinely accessible. Props, patience, and proper instruction remove the barriers that tend to put people off. Form matters far more than depth, and with live corrections, even complex poses like advanced pigeon pose become safe and progressive.
The most reliable way to build a consistent leg practice is with a teacher who can watch your alignment in real time. Habuild’s live morning sessions are structured exactly for this — guided, corrective, and built around showing up every day.
Frequently Asked Questions
Related Articles
Yoga Poses for Back Pain: Best Asanas for Lower Back, Upper Back and Sciatica
Back pain is the leading cause of disability worldwide, affecting 619 million people, and yoga is among the most evidence-supported non-pharmacological interventions for it. See the best asanas.
Types of Leg Workouts: Build Strength & Stability
Discover the best types of leg workouts to build strength, improve stability, and boost performance. Start your 14-day free trial trial with Habuild today.

How to Build Leg Muscles at Home
Squats, lunges, and glute bridges consistently train the quads, hamstrings, glutes, and calves — no gym or dumbbells needed. See the routine to build real leg strength.