
Mandukasana (Frog Pose): Steps, Benefits & Precautions
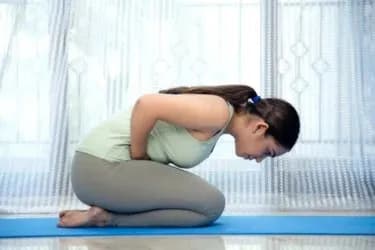
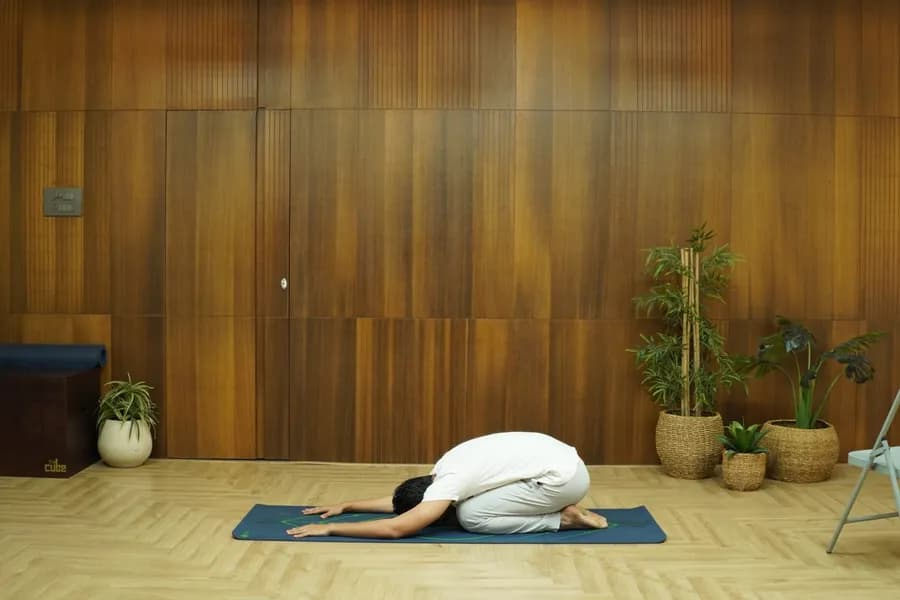
The knees spread wide while both fists press against the navel and the torso folds forward, compressing the abdomen to support digestive health. See the.
Key Takeaways
- Both fists press firmly against the navel while the torso folds forward from a kneeling base.
- Entered from Vajrasana, the kneeling thunderbolt seat, as its foundational starting point.
- The deliberate fist pressure on the abdomen is considered integral to its digestive value.
- The wide-knee position creates a sustained stretch through the inner thighs and groin.
- Works in close harmony with pranayama and digestive kriyas within a broader sequence.
- Accessible for most practitioners while offering depth for those who commit over months.
Mandukasana, or Frog Pose, is a kneeling yoga posture in which the knees are spread wide and both fists press firmly against the navel while the torso folds forward. Its core benefits include abdominal compression that supports digestive health, deep hip opening, lower back flexibility, and nervous system calming through slow, controlled breathing.
What is Mandukasana?
Mandukasana is a seated yoga posture whose name derives from the Sanskrit word manduka, meaning frog, and asana, meaning seat or pose. In English it is widely known as Frog Pose, and the pronunciation follows three clear syllables: man-doo-KAH-sana. When practised correctly, the body assumes a shape strikingly similar to a resting frog — knees spread wide, hips low, and the torso either upright or folded forward depending on the variation chosen.
The pose is traditionally entered from Vajrasana, the kneeling thunderbolt seat, which serves as its base. From that grounded foundation, the knees are slid wide apart and both fists are pressed firmly against the navel region, creating deliberate compression through the abdominal cavity. This intentional pressure on the abdomen is not incidental — classical yoga texts consider it integral to the therapeutic value of the pose, particularly in relation to digestive and metabolic health.
Within the broader yoga system, Mandukasana falls into the category of forward-folding and abdominal-compression postures. It works in close harmony with pranayama and digestive kriyas, making it a natural inclusion in sequences that target metabolic function, spinal mobility, hip openness, and emotional grounding. It is accessible enough for most practitioners while still offering genuine depth for those who commit to it over months of consistent practice.
Mandukasana Benefits
Physical Benefits
- Strengthens the Spine and Supports Postural Alignment Mandukasana gently lengthens the lumbar region while requiring the practitioner to maintain an engaged core throughout the hold. Regular practice may gradually ease stiffness along the spine and support better posture during daily activities. Those who sit at a desk for long hours often find this one of the most accessible poses for rebuilding back awareness and reducing habitual compression in the lower spine.
- Improves Hip and Groin Flexibility The wide-knee position of Mandukasana creates a sustained stretch through the inner thighs, hip flexors, and groin. Over weeks of consistent practice, this can contribute to a noticeably improved range of motion in the hips. Mandukasana pairs especially well with other hip-opening yoga poses that target the same muscle groups from different angles.
- Stimulates the Digestive Organs and Supports Metabolic Health The fist pressure applied at the navel creates gentle compression on the stomach, pancreas, and intestines. This stimulation may support digestive function and is widely recommended for those dealing with sluggish digestion, bloating, or irregular bowel patterns when practised consistently over time. It is also considered one of the classical poses that may support pancreatic health as part of a broader daily routine.
- Calms the Nervous System and Helps Manage Stress Holding Mandukasana with slow, controlled breathing activates the parasympathetic nervous system — the body’s rest-and-digest mode. The inward focus required during the hold naturally quiets mental chatter. Practitioners often describe a noticeable sense of calm settling in after just a few breath cycles in this posture, making it a valuable addition to any stress management routine. The evidence base for yoga for stress management highlights exactly this kind of posture-breath pairing as one of the most reliable pathways to emotional regulation.
- Builds Mindful Body Awareness and Emotional Steadiness Because Mandukasana asks you to hold discomfort softly — the compression is intense but manageable — it trains a quality of equanimity that gradually extends beyond the mat. Over consistent practice, this capacity to stay present with sensation rather than react to it tends to support greater steadiness in daily life as well.
Mental and Emotional Benefits
How to Do Mandukasana — Step-by-Step Instructions
Key Principles
Before beginning, hold three principles in mind. First, the abdominal compression should feel firm and intentional — never sharp or painful. Second, the breath is as important as the physical shape: long, slow exhales deepen both the compression and the calming effect. Third, always come out of the pose slowly to avoid sudden pressure changes in the abdomen.
Step 1: Starting Position
Begin seated in Vajrasana — knees together, sitting on your heels, spine tall. Take two or three full breaths here to settle your attention inward. Hands rest on your thighs, palms facing down. Feel the contact between your shins and the mat and allow the lower body to release any residual tension before you move.
Step 2: Form Your Fists
Curl both hands into firm fists with your thumbs tucked inside your fingers. This specific fist position creates a concentrated point of pressure rather than a broad palm contact. Bring both fists side by side and place them against your lower abdomen just below the navel, knuckles facing inward toward your body.
Step 3: Spread the Knees Wide
Slowly slide your knees apart on the mat, moving only as wide as is comfortable for your hips. Your feet remain flat, toes pointing outward. Depending on your flexibility, you will sit between your heels or lightly on them. Check that your hips are level and your pelvis is not tilting to one side.
Step 4: Fold Forward with Abdominal Compression
On a slow exhale, hinge forward from the hips and bring your torso toward the mat while maintaining firm fist pressure against your abdomen. Stop when you feel the compression clearly but comfortably — some practitioners reach their forearms to the floor, others hover midway. Do not strain the lower back to go deeper than is natural for your body today.
Step 5: Final Position and Hold
Hold for 20 to 60 seconds, breathing slowly and evenly. With each exhale, allow the abdomen to soften slightly further into the fists. Keep your gaze gently downward and your shoulders relaxed — there should be no gripping in the neck or upper back. Beginners may hold for three to five breath cycles; with time, build toward a full minute.
Step 6: How to Come Out of Mandukasana
On an inhale, slowly lift your torso upright, releasing the fist pressure from your abdomen as you rise. Slide your knees back together gently and return to Vajrasana. Sit quietly for several breaths before moving on, allowing any sensation in the abdomen to settle. If you are practising multiple rounds, rest in Child’s Pose between each one.
Breathing in Mandukasana
Exhale as you fold forward and deepen the abdominal compression. Inhale as you rise and release. While holding the pose, breathe slowly through the nose — a count of four in, a brief natural pause, and six out works well for most practitioners. Avoid shallow chest breathing; since the abdomen is compressed, direct the breath into the sides and back of your ribcage instead.
Preparatory Poses Before Mandukasana
- Vajrasana (Thunderbolt Pose) — The direct base for Mandukasana; warms the knees and ankles and settles the nervous system before you begin the wider leg position.
- Balasana (Child’s Pose) — Opens the hips gently and lengthens the lower back, preparing the body for the forward fold in Mandukasana.
- Baddha Konasana (Butterfly Pose) — Loosens the inner thighs and groin so the wide-knee position of Mandukasana feels less intense on the first attempt.
- Pawanmuktasana (Wind-Relieving Pose) — Activates the digestive organs before Mandukasana, making the abdominal compression more effective when you arrive in the pose.
Variations of Mandukasana
Variation 1: Ardha Mandukasana (Half Frog Pose)
Difficulty: Beginner-friendly. In this version only one knee is extended wide while the other remains closer to centre. The single-side approach reduces intensity on the hip and is an excellent entry point for practitioners with tight groins or limited knee flexibility. It also helps you notice any asymmetry between your left and right sides before working the full pose.
Variation 2: Upright Mandukasana (No Forward Fold)
Difficulty: Beginner to intermediate. Instead of folding forward, the practitioner remains seated upright with knees wide and fists pressed firmly at the navel. This places the full emphasis on abdominal compression without the added demand on the lower back, making it the preferred starting variation for people with lumbar sensitivity or those new to kneeling poses.
Variation 3: Advanced Mandukasana with Extended Arm Reach
Difficulty: Intermediate to advanced. After folding forward with the fists, release the fist position, extend both arms forward along the mat, and lower the chest progressively closer to the floor. This dramatically increases the hip opening and the spinal stretch. Only attempt this variation once you are fully comfortable in the standard version and have adequately warmed the hips.
Common Mistakes to Avoid in Mandukasana
- Pressing Too Hard on the Abdomen Applying excessive force with the fists can cause sharp discomfort or bruising on the abdominal wall. The pressure should feel firm and intentional — not painful. If you feel acute discomfort rather than a manageable compression, soften your fists slightly or use the flat of your knuckles instead of the sharp knuckle ridge.
- Rounding the Lower Back Aggressively Collapsing the lower back to reach deeper into the fold compresses the lumbar discs rather than stretching the abdominal region. Instead, hinge from the hips with a neutral spine for as long as possible before allowing only a gentle rounding in the final position. Think length first, then depth.
- Holding the Breath Because the abdominal compression is intense, many beginners unconsciously stop breathing. This defeats the therapeutic purpose of the pose entirely. Remind yourself continuously to breathe slowly — the exhale in particular is what deepens both the abdominal stimulation and the calming effect on the nervous system.
- Pushing the Knees Too Wide Too Soon Forcing the knees into a very wide position without adequate warm-up can strain the inner knee ligaments. Start with a width that feels comfortably challenging and widen progressively over weeks of practice, never trying to force extra range within a single session.
- Neglecting the Return Movement Coming out of Mandukasana abruptly — particularly by jerking the knees back together — can strain the hip adductors and create sudden pressure changes in the gut. Always return slowly, initiating the movement with an inhale and sliding the knees together gently rather than snapping them in.
Who Should Practise Mandukasana?
- Those Managing Digestive Discomfort or Metabolic Concerns Mandukasana is particularly valued for its abdominal compression, which may gradually support digestive health, pancreatic stimulation, and blood sugar management when practised consistently over time. It complements existing care for conditions like IBS, bloating, and metabolic concerns — not as a replacement for medical advice, but as a supportive daily habit that builds real results through repetition. Those managing blood sugar may also find the broader resource on yoga for diabetes a useful companion guide.
- Those with Stress, Anxiety, or Poor Sleep The combination of deep hip opening, abdominal work, and slow nasal breathing makes Mandukasana a grounding posture for the nervous system. Practised in the evening, it may help ease accumulated tension from the day and support more restful sleep. It works particularly well as part of a wind-down sequence for those dealing with chronic or low-grade stress.
- Is Mandukasana Good for Beginners? Yes — with the right modifications. Beginners should start with the upright variation to build comfort in the wide-knee seated position before adding the forward fold. Placing a folded blanket under the knees reduces pressure on the kneecaps, and keeping the forward fold shallow prevents lower back strain. With live guidance from a qualified instructor who can see your alignment in real time, most beginners feel confident in this pose within just a few sessions.
- Working Professionals and Those with Sedentary Routines If you spend most of your day seated at a desk, Mandukasana directly addresses the muscular tightening and postural compression that accumulates in the hips, lower back, and abdomen over hours of sitting. Even five consistent minutes including this pose each morning can make a meaningful difference to how your body feels through the rest of the working day.
Make Mandukasana a Part of Your Life
Mandukasana is a deceptively powerful seated posture that combines hip opening, abdominal compression, and nervous system support in a single accessible shape. Its key benefits span digestive health, spinal flexibility, stress management, and emotional steadiness — making it genuinely relevant for a wide range of practitioners, from complete beginners to those managing specific health concerns.
Whether you are stepping onto the mat for the first time, managing digestive or metabolic concerns, or a working professional looking to offset the physical effects of a sedentary day, Mandukasana is adaptable to where your body is right now. The variations described above mean there is always a safe entry point, and the modifications available ensure the pose remains accessible even if your knees or hips feel tight today.
The best way to learn Mandukasana correctly is under live guidance, where an instructor can observe your alignment and offer real-time adjustments. Habuild’s daily morning sessions are built exactly for this — with over 50,000 members practising together every morning, you will have both expert instruction and a consistent community to keep you showing up day after day.
Frequently Asked Questions
Related Articles
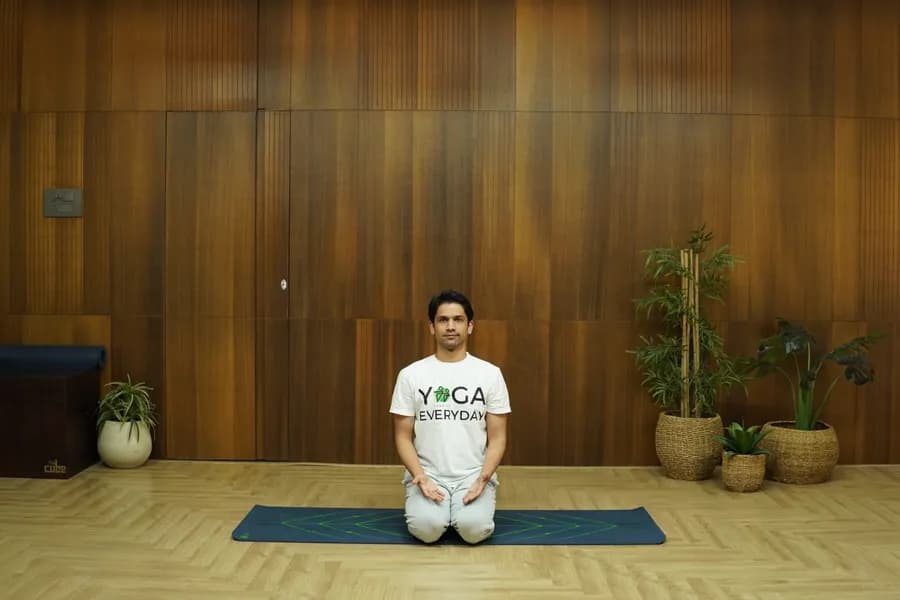
Vajrasana: How to Do It Benefits and Precautions
Practice vajrasana pose with Habuild. Try vajrasana to ease digestion, reduce back pain, and calm your mind. Ideal for all levels. Start your session today!
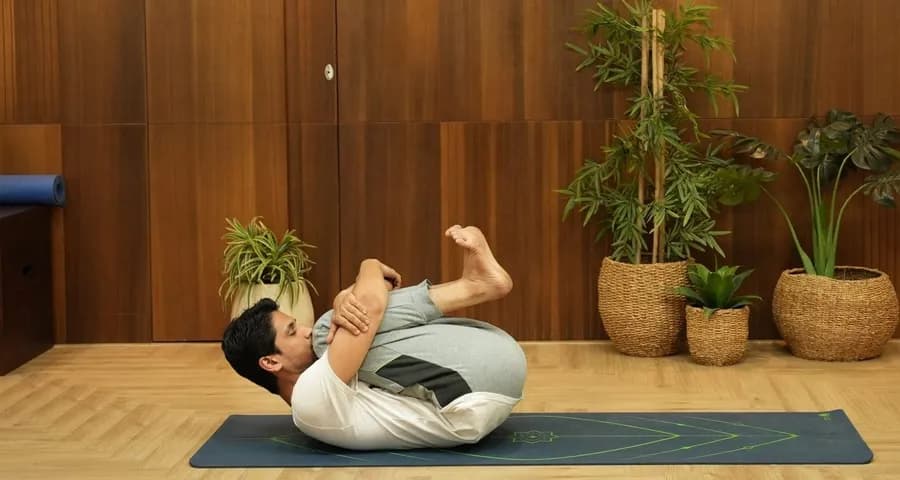
Pawanmuktasana (Wind Relieving Pose): Steps and Digestive Benefits
Try pawanmuktasana with Habuild. Discover pawanmuktasana benefits including gas relief, improved digestion, and reduced back tension. Start your session today!
Balasana (Child’s Pose): Steps and Benefits for Mind and Body
Try balasana with Habuild. Practice the balasana pose to relieve stress, ease back tension, and deeply relax your body and mind. Start your yoga session now!